Astrometry
This lesson is dedicated to the theory and practice of performing astrometry observations.
The following is the link to the ppt presentation with the theory of performing astrometries:
and the following is a link to the pdf:
INSTRUCTIONS TO OBTAIN ASTROMETRY OF ASTEROIDS
To perform this task you will need to the software Astrometrica 2016.
NOTE: This might not be the software currently in use at CTMO.
Note: If you are a Mac user you would need to run a Windows emulator. There are several options: Virtual Box is free and works for Mac and Linux. This is the link to download it:
https://www.virtualbox.org/wiki/Downloads
There are other options paying for an emulator: Parallels has very good reviews but it’s not free:
https://www.parallels.com
I chose also a non free option but one that I like it very much. It’s Crossover.
The advantage is that you don’t need to install windows (something that would be needed with Virtualbox and Parallels). The makers claim that it would run any windows program like a Mac application. It definitely does with Astrometrica.
The link for this option is:
https://www.codeweavers.com/crossover
1) Download the software Astrometrica : http://www.astrometrica.at
(it’s probably better to install it using the full zip file) or download the exe file right below this set of instructions:
2) Configure the program:
In the menu: "File/Settings/Open", select the file "821_Practicas.cfg".
in the tab Program select "UCAC4" in the square Star Catalog .
NOTE: the cfg page will need to be change when using the CTMO site. This example is design to work with images from the Astronomical Observatory of Cordoba Bosque Alegre station.
Go to the environment tab and in the directories box select the directories were you put the files. Select "VizierR" as an option for all in the tab "Catalogs".
Save all your changes, close the program and open it again (you need to do this to force the program to read the configuration).
3) Image reduction
A) open one image from the subdirectories containing the images for each asteroid provided below (you can open several at once). Click on the button astrometric data reduction (Ctl+A).The button is circle in red in the image below
Lesson 7
DATA
The following is a link to the executable file for astrometrica.
Setup-Astrometrica.exe the executable for direct download.
The following link is the configuration file that you need to use. Download it and put in the directory where you will download all the asteroid subdirectories.
The following are compressed directories with sequences for the asteroid observations.
The following is a compressed directory containing a data base of orbits for Minor planets:
4) Obtain at least three astrometries (graduate students obtain at least five per each of the following objects:
583 Klotilde
907 Rhoda
1334 Lundmark
1794 FINSEN
2381 Landi
5) Select File-> Reset File in the menu.
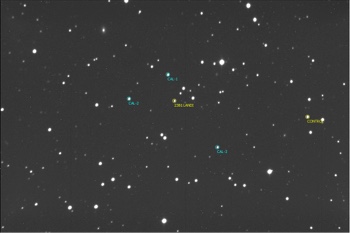
6) Select the asteroid. Verify that SNR is larger than 7 and that the measure magnitude is similar to the theoretical one. Enter the abbreviated name of the object in the blank space in object designation (after clicking on it to select). If the object exist in the catalog it should appear in the list of objects close to the center of the image when clicking browse. Selecting from the list will show the abbreviated name. Accept after verifying. A pink circle will appear surrounding the object.
7) Add one astrometry line in File->View MPC report file.
8) Perform the other astrometries avoiding those images where the asteroid appears superimposed with stars or with low SNR. It is convenient to have astrometries separated in time.
B) With this button you would need to provide the coordinates of the center of the image. Alternatively if you know the object you expect to localize in the images you loaded you can enter its name in object line which opens when you click on astrometric data reduction.
C) If you don’t know the name of the object, neither the coordinates, you can do the following: go to Images -> Edit Image Parameters. The date will appear in the box and the time of the middle of the exposure. With that information (the ephemerides) you can obtain the coordinates from the Minor Planet Center (MPC) database.
D) One very useful way to obtain the coordinates is to use the site astronomy.net.
You would need to type in a web browser: https://nova.astrometry.net/upload
You would be able to obtain the coordinates (RA and DEC) from the output.
E) Reduce the images by aligning the red circles with objects (stars) in your image. You do this by clicking on the arrows that appear in the box “Aligning Reference Stars”. Notice that in addition to clicking on the arrows you will need to also change “Position Angle” and “Focal Length”. Eventually you will need to correct the information in the tab CCD on the File->Settings menu.
F) After clicking OK on the astrometric reduction button red circles will appear in your images. These red circles represent the position of know stars and objects in the field of view of your image based on the coordinates entered. (notice that depends on the configuration adopted and the CCD characteristics). Reduce all images.
G) Verify the cardinal points read in the images reading the RA and DEC while following the cursor over the reduced images.
H) Detect the asteroids using the “Blink” button. Astrometry of Image" obtained from the menu ˙: "File/View Log File".
I) Find the asteroids with the names contained in the files, for each field using the blink function over the sequence of images. Take note of the direction in which they move estimating the angle (from North to East).
